
Rideshare Dash Cam Guide: Setups, Specs and Rules
40% of dash-cam owners had captured a crash or traffic incident, according to a June 2025 survey of 989 licensed U.S. drivers published by Couponzania. That’s a private consumer survey, not a government count, but it reframes the purchase: a rideshare dash cam is an evidence tool, not just a windshield accessory.
The useful setup isn’t necessarily the camera with the sharpest advertised picture. It’s the combination of coverage, reliable storage, passenger disclosure, and a workable response plan. You need to know what the camera misses, whether the files survive, and who can help while an incident is still unfolding.
Table of Contents
- Dash Cam Setups Compared for Rideshare Driving
- Specs That Make Footage Usable as Evidence
- Recording Rules, Consent and Platform Policies
- Why Live Monitoring Changes the Response
- Local, Cloud and Hybrid Storage Compared
- How to Install and Test Your Rideshare Dash Cam
- Pick Your Setup Before Your Next Shift
Dash Cam Setups Compared for Rideshare Driving
53% of gig and rideshare workers use a dash cam, according to a nationally representative U.S. survey conducted in 2025 by AutoInsurance.com and reported by RoadGearLab. Choosing the right configuration starts with the kind of incident you need to document.
Rideshare dash cam setups by coverage
| Setup | Cameras | What It Captures | Storage Need | Best For |
|---|---|---|---|---|
| Front-only | One | Road ahead, plates, signals | Lowest | Drivers who mainly need collision evidence |
| Front and rear | Two | Road ahead plus rear approach and rear-end impacts | Medium | Dense traffic and airport queues |
| Front and cabin | Two | Road ahead plus passenger area | High | Documenting passenger conduct, subject to consent rules |
| Dual-channel with infrared cabin | Two | Front plus cabin in low light | High | Night shifts and late pickups |
| Triple-channel (front, rear, cabin) | Three | Road ahead, road behind, and cabin | Highest | Fleets and high-volume drivers |
These storage labels are planning categories, not fixed consumption rates. Actual file size follows resolution, bitrate, and recording settings; a front-and-rear system can consume more storage than a front-and-cabin system configured differently.
Choose the gap you can accept
Front-only is the simplest starting point. It documents lane position and signals, but a jolt from behind may appear without showing the approaching vehicle, and it won’t explain an interaction in the back seat.
Front and rear adds useful context for tailgating, reversing disputes, and rear impacts in airport queues. You accept another cable run and more recording activity on the card without gaining a direct view of passenger conduct.
Front and cabin trades that rearward road view for the passenger compartment. Aim the interior lens to include the rear bench and driver interaction area, rather than a close-up of the driver’s face.
For late shifts, infrared cabin capture is the practical upgrade. Don’t assume a front camera’s good night performance means the interior camera can see an unlit back seat.
A triple-channel system covers those separate views together, but it isn’t complete coverage of every exterior angle. It also adds installation work, larger exports, and more writes to the storage card.
Physical placement still decides coverage
Compare sample views before buying. A wide lens can still miss a passenger behind a headrest, while an excessively wide image can make important details small.
If you’re considering phone-based capture, distinguish physical road cameras from dual-camera video using a phone’s front and rear cameras. The mounting position determines what either arrangement sees.
Practical rule: Match the setup to the incident you most need to document, not simply the route you drive most.
Specs That Make Footage Usable as Evidence
Usable detail beats headline resolution. A bright, sharp-looking clip isn’t enough if headlights obscure the plate or motion turns a sign into a smear.
Independent testing by CNN Underscored found better distant detail with 4K than 1080p, supported a benchmark of 3840 × 2160 at 30 fps with HDR, and indicated that a 1440p Sony STARVIS 2 camera could outperform a generic-sensor 4K camera in low light. Those findings explain the recommended targets below.
Rideshare dash cam specs: minimum and recommended
| Spec | Minimum | Recommended | Why It Matters |
|---|---|---|---|
| Resolution | 1080p | 4K (3840 × 2160) at 30 fps | Plates and signs at distance |
| Dynamic range | Standard | HDR | Reduces washout at dusk and from headlights |
| Image sensor | Generic | Sony STARVIS 2 class | Low-light quality can outweigh resolution |
| Storage card | Standard microSD | High-endurance microSD | Continuous recording wears cards |
| GPS and timestamp | Time only | GPS time and location | Ties each clip to route and time |
| Power | Cigarette lighter | Hardwired with voltage cutoff | Limits battery discharge during parking mode |
The minimum column describes basic functionality, not an ideal shopping list. For paid driving, I would prioritize the recommended storage card even before adding another camera.
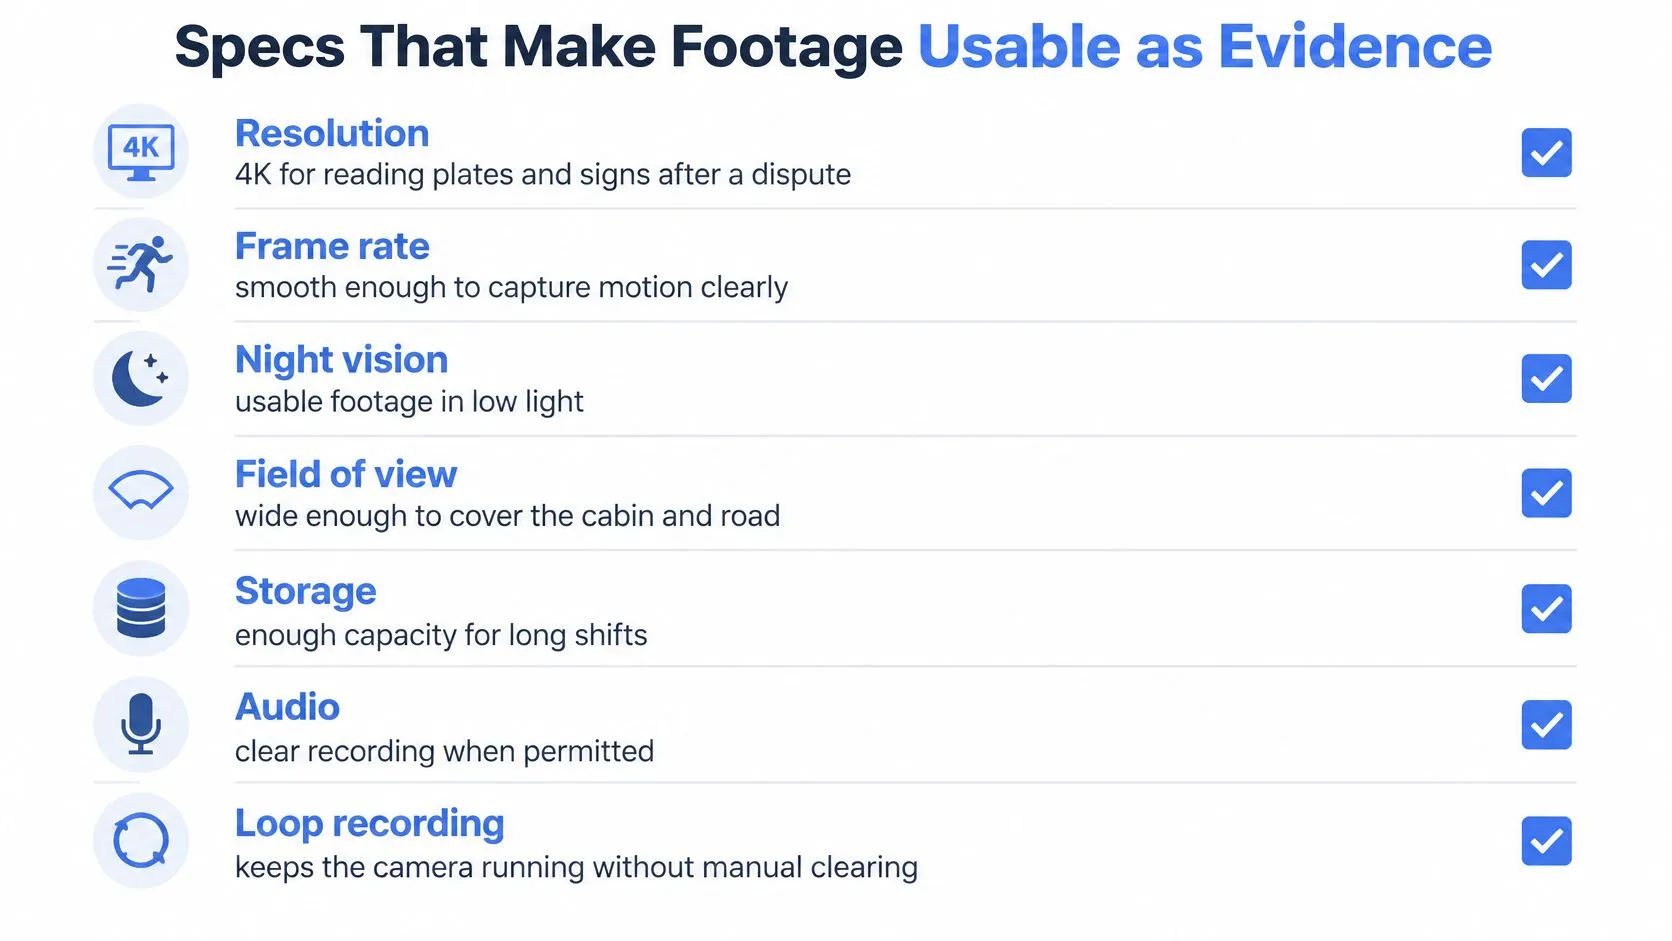
Use this checklist when comparing the complete recording system.
Read the specification as a system
Resolution helps preserve distant detail, but doesn’t guarantee identification through glare, rain, or motion. Check which resolution remains available when every camera is recording, rather than relying on the front-camera maximum.
HDR matters when the scene contains both dark areas and intense light. Look for controlled highlights around reflective plates and headlights, not merely a brighter overall image.
The image sensor deserves its own check. If a manufacturer highlights resolution but doesn’t identify the sensor or provide representative night footage, don’t assume the larger resolution figure means a better image.
Make the files dependable
Choose a high-endurance microSD card supported by the camera manufacturer. Continuous rewriting is demanding work; a card that stores holiday photos successfully isn’t automatically suitable for recording every shift.
Set loop segments short enough to export conveniently, then verify that adjacent segments play without missing context. Keep the original files after an incident, including footage before and after the impact or interaction.
GPS and timestamps help reconcile footage with the trip record, but incorrect time settings create avoidable confusion. A compatible hardwire kit with a voltage cutoff supports parking recording while limiting battery discharge; it doesn’t provide unlimited parked runtime.
For a Texas injury claim, the Law Office of Bryan Fagan evidence guide is a useful companion when organizing footage alongside other claim materials. A camera specification alone won’t settle whether your footage is useful: the final decision comes from playback of your own night test.
Recording Rules, Consent and Platform Policies
A rideshare dash cam is a policy decision as well as a hardware purchase. Turning it on creates responsibilities around notice, audio, access, and what happens to recordings afterward.
Make passenger disclosure part of the installation, not something you improvise after someone notices the lens.
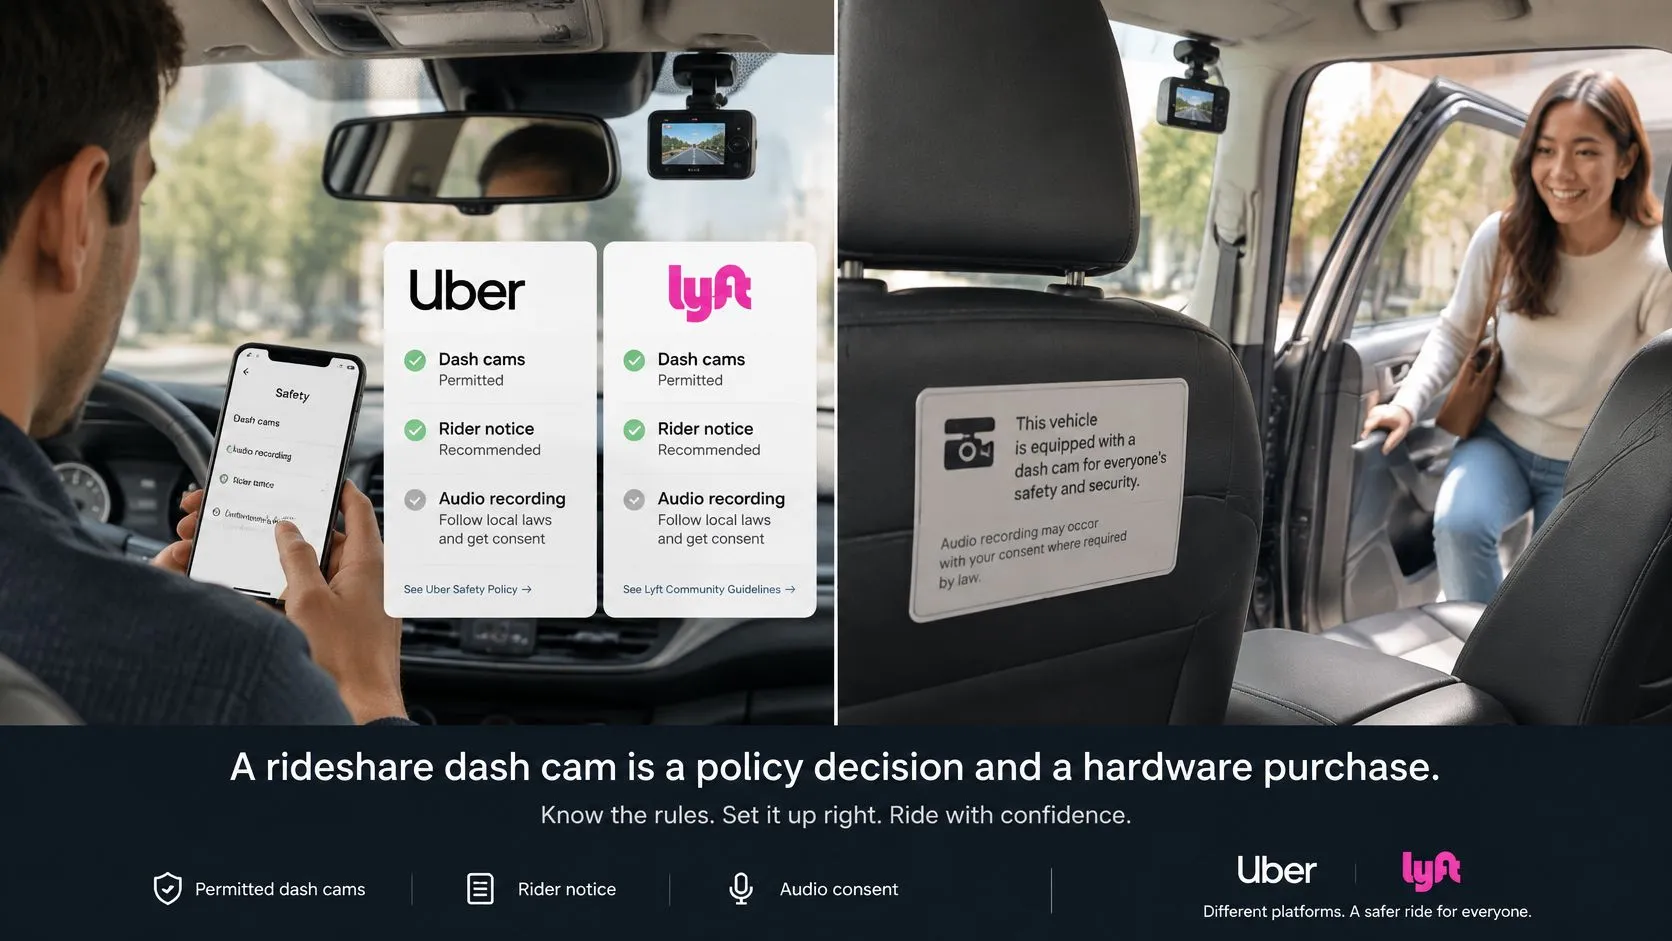
Uber and Lyft rules for dash cams and recordings
| Topic | Uber | Lyft |
|---|---|---|
| Dash cam use | Allowed for transportation purposes | Register the dash cam in the Driver app |
| Passenger notice | Local law may require disclosure and consent | Riders are notified that recording may occur |
| Audio | Local consent rules apply | In-app Ride Recording can capture audio |
| Sharing footage | Broadcasting rider image, audio, or video is prohibited | In-app recordings stay private unless attached to a safety report |
| Who can access | Use is restricted to transportation-service purposes, not unrestricted access | Lyft Safety Team can access in-app recordings attached to a safety report |
Uber’s camera guidance permits transportation-related recording while warning about local disclosure and consent requirements and prohibiting public broadcasting of riders’ recordings. Lyft’s Ride Recording guidance describes private in-app audio recordings that its Safety Team can access when attached to a safety report.
That distinction matters: Lyft’s in-app recording safeguards don’t automatically describe the files on your independently owned dash cam. You remain responsible for securing that card and controlling exports.
Treat privacy as part of passenger safety
Platform permission isn’t a substitute for applicable law. Check the rules for the jurisdictions where you pick up and travel, especially before enabling cabin audio; a sign or app notification isn’t automatically sufficient consent everywhere.
An unexplained camera can make a passenger uncomfortable. Clear disclosure gives them an opportunity to understand the setup before the trip, while restricted access avoids turning a safety recording into entertainment.
Build your routine around these practices:
- Visible notice: State whether the vehicle records road video, cabin video, and audio. Place the notice where a passenger can easily read it.
- Audio off by default: Enable it only when your legal and consent process supports it. Verify the setting after resets or firmware changes.
- Written retention: Specify when ordinary footage is deleted, who can access it, and how incident files are preserved separately.
Keep the distinction between recording permission and sharing permission clear when reviewing recording guidance.
Before a ride, confirm settings and required disclosure. During the ride, handle objections calmly and follow applicable law and platform procedures rather than arguing about the camera. Afterward, share relevant material through authorized reporting channels, not social media.
Why Live Monitoring Changes the Response
A saved clip can help establish what happened. It can’t call for help when the driver can’t safely stop, access a phone, or explain their location.
Recording saves the clip; monitoring puts a person in the loop before the clip is needed.
Uber’s recording guidance addresses recording devices and their permitted use, not a promise that someone is watching every trip. Don’t confuse permission to record with an active emergency-response service.
Compare what happens at each moment
| Moment | Recording alone | A monitored workflow |
|---|---|---|
| During the trip | Saves footage for later review | An authorized reviewer can follow available video, audio, and route context |
| When something goes wrong | Driver or passenger must initiate help separately | A reviewer can contact the user and escalate relevant information |
| After the trip | Files must be retrieved and matched to the incident | Review should include the recording and any available alert or escalation history |
During the trip, monitoring only helps if someone has accepted the watching role. A sent invitation or visible stream doesn’t establish that a trusted contact is paying attention.
During an incident, the reviewer needs an escalation process, not just a screen. That means being able to distinguish a lost connection from an emergency, contact the user, and provide responders with location and relevant context.
Afterward, recordings still matter. For passengers organizing an accident claim, legal guidance for injured rideshare passengers from Nares Law Group LLC provides a useful starting point alongside the trip receipt and incident documentation.
Test the human response, not just the stream
Compare live remote video monitoring against a practical checklist: who receives an alert, how they acknowledge it, what they can see, and what they do if the user doesn’t answer. More cameras won’t solve an unattended alert.
Our Safety Agents monitor the live stream, view both cameras, and reach the user by call or chat. Starting or using SOS/dispatch authorizes us to share information, which may include location, with RapidSOS and public safety responders; the integration may continue limited post-incident location sharing for up to an additional 30 minutes.
Test the workflow while parked. Confirm whether a responder can receive useful context without the user opening a phone, and identify what stops working when cellular service disappears. A monitoring app isn’t a substitute for calling emergency services when you can safely do so.
The decisive questions are who sees the footage, and how fast can that person act?
Local, Cloud and Hybrid Storage Compared
Start with what must survive, not the largest card you can buy. Routine footage needs a deletion schedule; an incident needs preservation before normal recording overwrites it.
Continuous footage eventually fills any card. Your storage choice determines where the surviving copy sits and how you retrieve it when the camera, phone, or vehicle isn’t available.
Storage options for rideshare dash cam footage
| Storage | Where Footage Lives | Retrieval After an Incident | Main Risk |
|---|---|---|---|
| Local microSD loop | Card inside the camera | Card removal or wireless transfer | Overwritten by the loop or lost with the camera |
| Cloud-connected | Provider servers for uploaded footage | Available after a successful upload | Upload delays and provider access policies |
| Hybrid with event upload | Loop kept locally, locked clips uploaded | Quick access to successfully uploaded flagged clips | Unflagged footage remains only on the card |
| Local with fleet retention rule | Card plus a defined preservation schedule | Retrieval through the fleet’s assigned process | Relevant clips deleted before a dispute surfaces |
Choose retrieval you’ll actually use
A local loop is straightforward for a part-time driver willing to manage files. Keep a compatible card reader available and practice exporting a clip without editing or converting the original.
A cloud-connected camera adds an off-vehicle copy only when uploading succeeds. A tunnel, garage, weak connection, or interrupted power supply can delay that copy, so check upload status rather than assuming the cloud has everything.
A hybrid system is a practical fit for a full-time driver who wants continuous local coverage and off-device protection for selected events. Its weak point is event selection: an uneventful-looking pickup can become disputed later, even though no impact sensor flagged it.
A fleet retention rule makes preservation a named responsibility. Assign someone to retrieve incident footage, verify the export, and document when ordinary files are cleared.
Storage check: A locked clip on a stolen camera is still a lost clip. A promised cloud copy isn’t a backup until the upload has completed.
Separate routine deletion from incident preservation
Keeping everything indefinitely creates unnecessary privacy exposure. Deleting too aggressively can remove relevant footage before a complaint arrives.
Write separate procedures for routine footage and reported incidents. Preserve the relevant original files, restrict access to the people handling the matter, and take legal advice about preservation obligations when a claim or investigation arises.
Don’t format the only card containing a disputed trip just because you need to start another shift. Swap in a compatible spare and secure the original until you’ve verified the necessary copies.
How to Install and Test Your Rideshare Dash Cam
A careful installation should disappear into the driving routine. Loose cables, an obstructed lens, or an unnoticed recording error can undermine an otherwise sensible purchase.
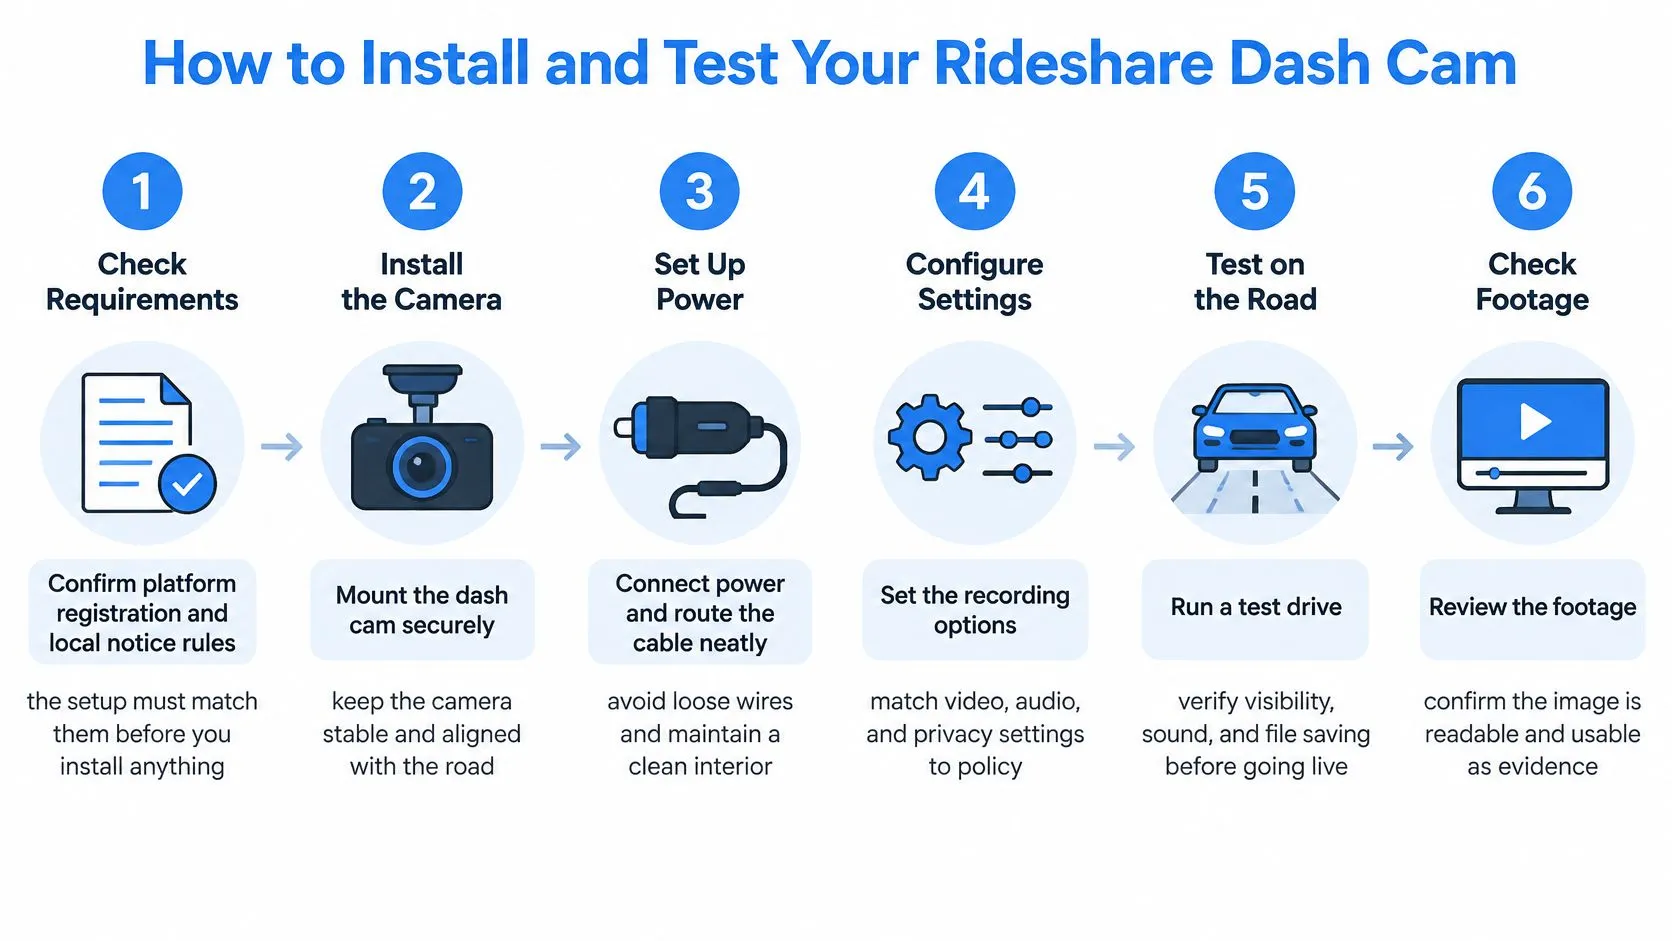
Use the installation flow as a checklist, then verify the actual files rather than relying on the camera’s recording light.
Install for a clear view and safe power
-
Confirm registration and notice requirements. Complete any platform registration and prepare the appropriate passenger disclosure before recording trips. Check that your proposed mount also complies with local windshield-obstruction rules.
-
Mount securely and check every angle. Position the front camera high near the rear-view mirror without obstructing your view, with the lens looking through glass cleared by the wipers. Don’t place the lens outside the swept area merely to hide the camera; rain and grime can make that position unusable.
-
Connect power safely. For parking mode, use a compatible hardwire kit with a voltage cutoff, installed according to the vehicle and camera instructions. Route cables away from pedals, controls, and airbag deployment paths, and use a qualified installer if you can’t identify a safe fuse connection.
-
Prepare the card and loop recording. Format the supported high-endurance card in the camera after saving anything already on it. Record and export a sample segment, because a card appearing in the settings menu doesn’t prove reliable file writing.
Configure before the first passenger
-
Verify video and audio settings. Confirm that every intended channel records, then keep the microphone disabled unless your disclosure and consent process permits audio. Check the exported file too, since an on-screen icon can be misunderstood.
-
Set time and inspect location playback. Confirm the timezone and daylight-saving setting, and check any GPS information in the supported player. Compare the displayed time against the phone’s trip record before relying on it.
-
Run a night test and review it while parked. Use a route with streetlights, darker stretches, and reflective signs, then inspect a safely recorded parked vehicle’s plate. Check the cabin with its lights off, and export files from each camera rather than judging only the live preview.
A correct setup produces steady frames, usable detail where conditions permit, consistent timestamps, and the expected location information. No camera guarantees readable plates in every scene, so adjust the angle or settings when your test exposes a weakness.
For fleets, log the configuration, card identity, retention setting, and night-test date for each vehicle. Recheck after windshield work, camera movement, card errors, or configuration changes rather than treating installation as a permanent pass.
Pick Your Setup Before Your Next Shift
Choose the smallest system that covers your actual concern. Buying every channel doesn’t help if you won’t maintain the storage or manage passenger recording properly.
- Collision evidence in lighter traffic: Front-only is a reasonable starting point when you accept the missing rearward and interior views. Put the effort into reliable recording and verified exports.
- Dense traffic and airport work: Front and rear is the stronger fit when following vehicles and pickup queues are your main concern.
- Passenger interactions and late shifts: Choose front and cabin, with infrared for an unlit interior. Make disclosure and file handling part of the operating routine, not an optional accessory.
If you need assistance during the trip rather than documentation afterward, compare live oversight separately from the dash cam. Don’t assume buying a connected camera means anyone will respond to an emergency.
Before your next shift, confirm the applicable recording rules, select your configuration, and complete the installation checks. Resist buying a more complicated system until you know which missing view or response capability you’re trying to add.
Your action this week is concrete: record a night test and successfully export it from every installed camera. If you can’t retrieve and understand the files while safely parked, the system isn’t ready for a disputed trip.
3rd-i offers live video, audio, and route sharing with selected contacts, with a Safety Agent and emergency dispatch one tap away. Visit 3rd-i to compare that live oversight with recording alone and decide whether it belongs alongside your rideshare dash cam.