
SOS Push Button: How It Works, Types and Limits
You’re walking to your car after a late shift, your phone is in your hand, and someone starts following you across a dark parking lot. You don’t have time to open the screen, find a contact, and explain where you are. That’s the moment an SOS push button is built for, but pressing it is only the start of a chain. Whether help arrives depends on what the button sends, who receives it, and what happens when you can’t press it at all.
Table of Contents
- What an SOS Push Button Is and the Main Types
- How an SOS Alert Travels to a Responder
- Location Accuracy Responders Can and Cannot Rely On
- How to Set Up an SOS Button Before You Need It
- Privacy and Trade-offs in Richer Alerts
- Why One Tap Can Still Fail and What Covers the Gap
- Choose the SOS Setup That Fits Your Situation
What an SOS Push Button Is and the Main Types
An SOS push button is a single control that sends a distress alert, usually with your location, to people or services who can help. It can sit on a pendant, a wall, a phone screen, a lock screen, or a watch. The button itself isn’t help. It’s a route to help, and the route matters as much as the press.
That idea goes back to radio. According to the International Telecommunication Union history of SOS, Germany introduced the signal in national radio regulations in 1905, and the 1906 International Radiotelegraph Conference in Berlin adopted it for international maritime use with representatives of approximately 30 nations attending. SOS was a Morse pattern, ··· --- ···, chosen because it was simple and distinctive. It did not originally stand for “Save Our Ship” or “Save Our Souls.”
The design lesson still holds. An emergency trigger must be easy to recognize, fast to activate, and understood across organizations, whether you’re at home, on a train, or inside a building. If you use an iPhone, it’s worth understanding emergency SOS on iPhone so you know how the built-in shortcut differs from an app-based button.
SOS Button Types at a Glance
| Type | How it is triggered | Who receives the alert | Needs a phone signal? |
|---|---|---|---|
| Pendant with base unit | Press the pendant button | Monitoring center by landline or cellular link | No, but the base needs power and a connection |
| Phone app SOS | Tap an in-app or lock-screen button | Chosen contacts and a monitoring service | Yes, mobile data or cellular |
| Watch or wearable SOS | Press the side button or tap a complication | Contacts and emergency services through a paired phone or cellular watch | Usually yes, via phone or cellular connection |
| Wall-mounted panic button | Press the fixed button | Campus, building or school security | No, usually wired or on a local network |
| Satellite messenger SOS | Press a dedicated SOS key | Global emergency response center | No, works through satellite |
An app SOS does not replace dialing 911 or your local emergency number.
Read the table by asking two questions. First, who receives the alert, a friend, a monitoring center, building security, or a satellite response center? Second, what connection carries it? A pendant that works at home may be useless on a hike, and a phone app that’s perfect on campus may fail where there’s no cellular signal. Our SOS and dispatch features are not a substitute for dialing 911 or local emergency equivalents, and that’s true for any button you choose.
How an SOS Alert Travels to a Responder
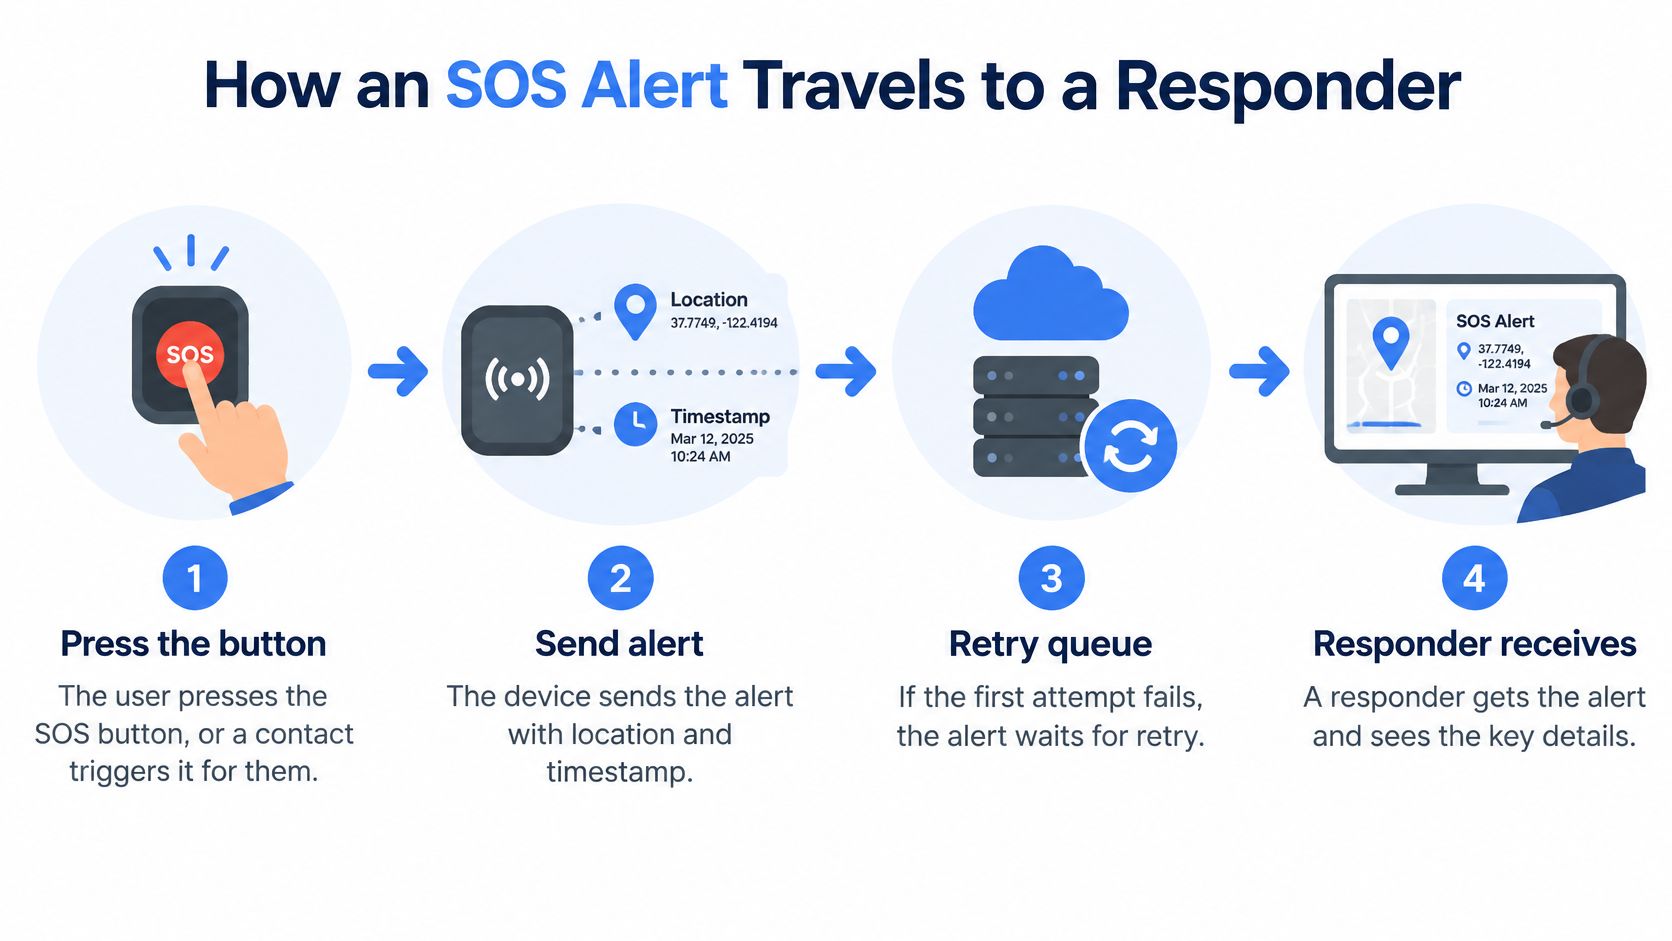
Say a student presses SOS during a walk home. The press should start a sequence, not a single notification. First, the device creates the alert locally with a timestamp and location. If the connection drops, it queues the event for retry instead of losing it.
Next, the alert travels to a human. In our service, pressing SOS, or an Emergency Contact triggering it on your behalf, sends your stream and location straight to 911 through a 3rd-i Safety Agent. That means you’re connected to a real person, with 911 behind them, not just an automated push notification. The agent can call or chat with you, view the live stream, and decide whether to escalate.
The diagram below shows the basic path from press to responder.
Four Stages You Should Be Able to See
A reliable system separates these stages instead of showing one vague confirmation:
- Alert sent: The app or server log confirms the alert left your device.
- Human monitor acknowledged: A monitoring agent confirms a person has seen it.
- 911 escalation initiated: The agent or system confirms the handoff has started.
- PSAP confirmation: The Public Safety Answering Point confirms receipt.
That distinction matters because, as the FCC guide to wireless 911 service explains, wireless providers must transmit 911 calls to a Public Safety Answering Point even when the caller does not subscribe to that provider. An app alert isn’t automatically a completed emergency call. “Alert sent” is not the same as “911 has it.”
Where dispatch integration exists, the agent can pass the stream, location, and critical information directly to the answering point. The RapidSOS network is used by 21,000+ public safety agencies in six countries, but integration still depends on local coverage. You can see how continuous access fits into that chain in our overview of a 24-hour safety app.
If a stage never completes, the system shouldn’t sit silent. It should retry the send, prompt you to call the local emergency number directly, and notify trusted contacts that escalation is still pending. A good post-incident log also records timestamps, delivery receipts, battery status, and connectivity changes, so you can tell whether a delay came from radio loss, a server problem, or a cancellation.
Location Accuracy Responders Can and Cannot Rely On
The blue dot on your map looks exact. A responder can’t always treat it that way. Your phone combines GPS, Wi-Fi, and sensor data for a continuously updated position, but when those signals fail, the network may fall back to cell-site information that’s much less precise.
Location Sources and Their Precision
| Source | Typical precision | Best used for |
|---|---|---|
| GPS | Often within a few meters outdoors with a clear sky | Street-level position for a moving user |
| Wi-Fi positioning | Often tens of meters where networks are mapped | Indoor fixes in buildings and campuses |
| Cellular network (cell-site) | Commonly hundreds of meters and sometimes wider | Fallback when precise positioning is unavailable |
| Last valid fix | Accurate only as of its timestamp | Showing where the user was when GPS dropped |
The FCC overview of 911 and Enhanced 911 services notes that traditional accuracy standards generally range from 50 to 300 meters depending on the technology used. More recent location-based-routing rules use a stricter threshold, routing calls based on handset location when the device can be located within a 165-meter radius at a 90% confidence level. That’s useful for routing, but it still may not tell a responder which entrance, floor, or parking level you’re on.
Say you walk into a parking garage and GPS drops. A well-designed alert shouldn’t send a blank location. It should preserve the last valid fix, show how old it is, and keep trying to refresh it during the incident.
A responder-ready alert carries more than coordinates:
- Latitude and longitude: The raw position.
- Timestamp and horizontal uncertainty: How recent the fix is and how wide the possible area is.
- Movement state: Whether you’re walking, driving, or stationary.
- Building, floor, or entrance details: The information that solves the final-access problem.
Check whether your app shows data age and confidence, not just a pin. Then add entrance information for places you visit often, such as a dorm, office, or apartment building. Our guidance on how to improve location accuracy covers the settings that affect that fix. A live route also helps an agent distinguish a moving user from a stationary incident, which changes how they brief responders.
How to Set Up an SOS Button Before You Need It
Setup is where most SOS failures are prevented. Do it on a calm day, with a contact available to receive a test, and treat each step as a check rather than a formality.
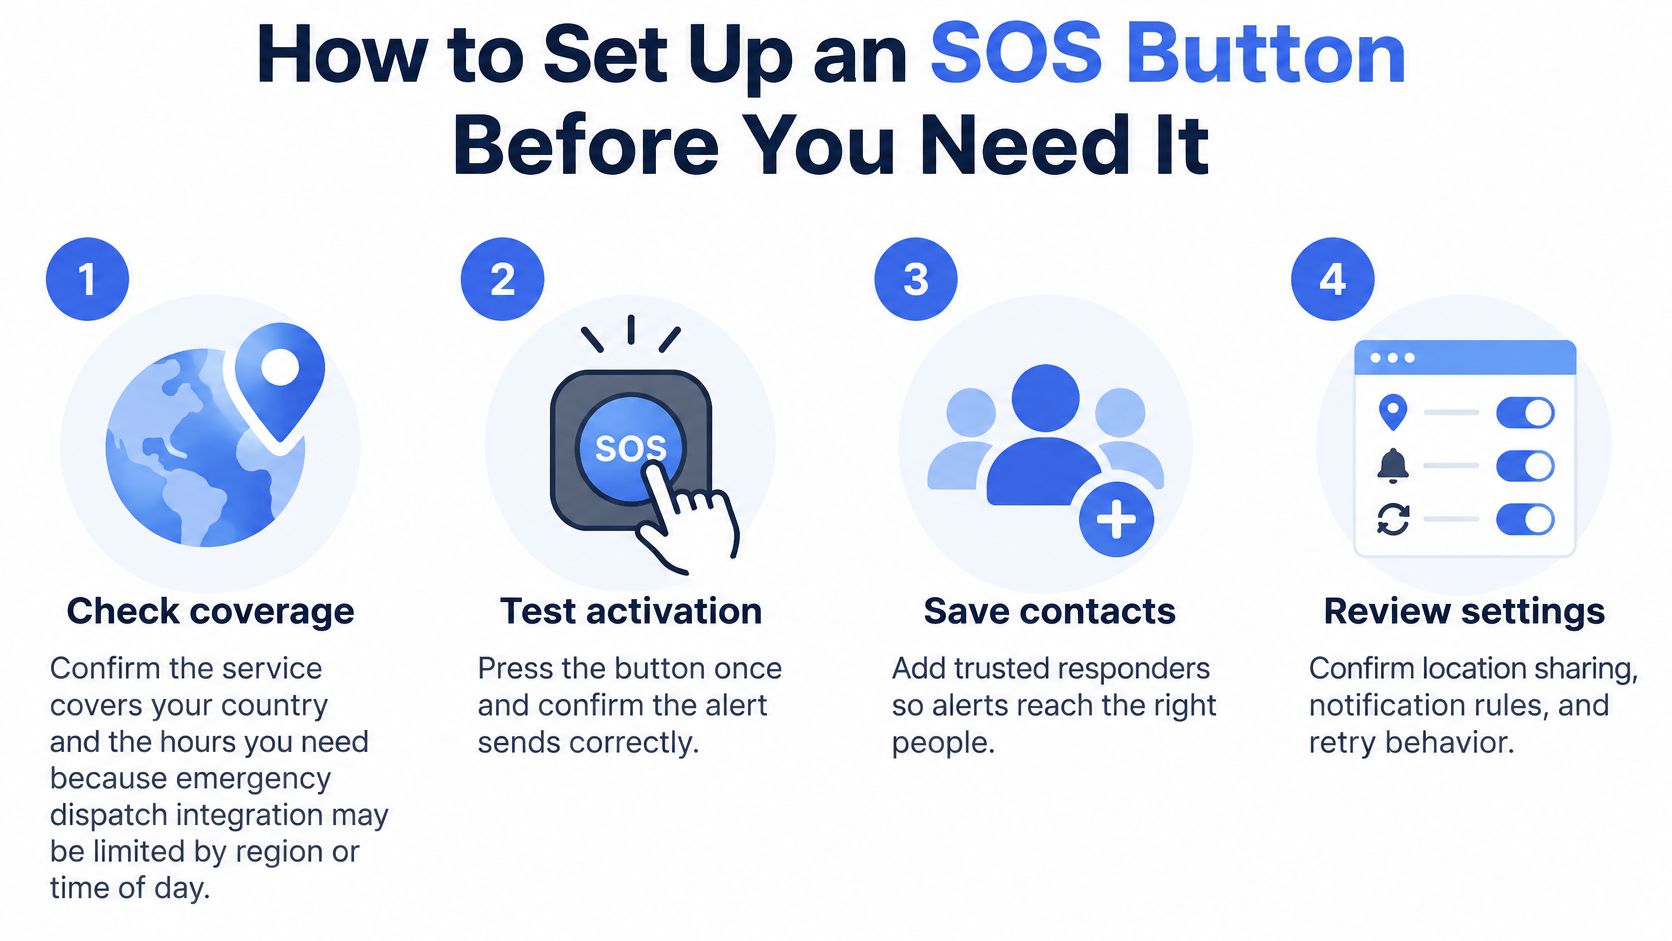
The checklist below summarizes the core setup tasks before the detailed steps.
Setup Steps in Order
- Confirm coverage first. Check that the service covers your country and the hours you need, because dispatch integration can be limited by region or time of day. Our RapidSOS SOS and dispatch features are currently available only in the United States and may not be available in all areas or at all times.
- Allow precise and background location. Without it, an alert sent while the app is closed may carry a stale or coarse position.
- Allow critical alerts. Emergency notifications need to reach contacts through silent mode and Do Not Disturb, or the alert can sit unseen.
- Add two or three contacts who know the plan. Pick people who will respond, and tell them what an alert from you means and what you want them to do.
- Run a live test. Press the button, then check delivery time, location accuracy, and whether each status update appears. Review the relevant options in your emergency SOS settings before you test, so you’re not discovering a disabled permission during a real event.
- Learn how to cancel. Note the cancellation steps before you need them. Where a service uses a PIN to disable dispatch integration, record it securely. Our RapidSOS integration can be disabled only after the correct PIN is entered and the dispatch is dismissed.
- Keep a backup route. A second phone, a charged pendant, or a satellite messenger for remote travel covers the case where your main device is dead or out of signal.
Practical rule: If you haven’t tested it with a contact watching, you don’t yet know whether it works.
The test is the step that proves the rest. If your contact didn’t receive the alert promptly, if the location was wrong, or if the status never moved beyond “alert sent,” fix that now. And keep the basic rule in view throughout: an SOS button supports an emergency call, it doesn’t replace dialing 911 or your local emergency number when you can make that call directly.
Privacy and Trade-offs in Richer Alerts
More context helps a responder act faster. It also means more sensitive material leaves your phone. As a recent paper on mobile safety systems describes, contemporary systems may continuously process GPS, audio, video, movement, and biometric signals, with costs that include battery drain, dependence on internet availability, and privacy risks from collecting sensitive recordings. The key question isn’t which button collects the most. It’s what’s the minimum data needed for a credible response.
Consider each data type as a trade:
- Live GPS route: Shows movement and direction, but creates a continuous location history held by the service.
- Front and rear video: Shows your surroundings and your face, but may capture bystanders who never agreed to be recorded.
- Audio: Confirms distress even when you can’t type, but needs clear retention and deletion rules.
- Automatic transcription: Speeds up review after an incident, but stores sensitive text in more places.
- Movement or inactivity detection: Can prompt for help without a press, but can also trigger false alarms and unwanted responder visits.
Say a student starts a live stream from a rideshare. Her contact sees the route and can tell the car has left the expected road. At the same time, the rear camera may record a passenger in the next seat who didn’t consent to any of it. Both things are true, and a good service should be clear about both.
Consent also changes at the moment you escalate. By starting or using SOS and dispatch, you authorize us to share your information, which may include location, with RapidSOS and public safety responders to facilitate emergency assistance. That’s necessary for dispatch, but you should know it before you press, not after.
Before you rely on any service, ask four direct questions. What is recorded? Who can watch it? How long is it kept? How does cancellation work? If a provider can’t answer those plainly, including how recordings and transcripts are deleted and who can view them in the meantime, treat that as a safety gap, not a minor policy detail.
Why One Tap Can Still Fail and What Covers the Gap
Faster activation doesn’t automatically mean faster rescue. The harder problem is whether a person can, or will, press the button under stress. The image below shows the ideal case, a person who is conscious, near the button, and able to use it.
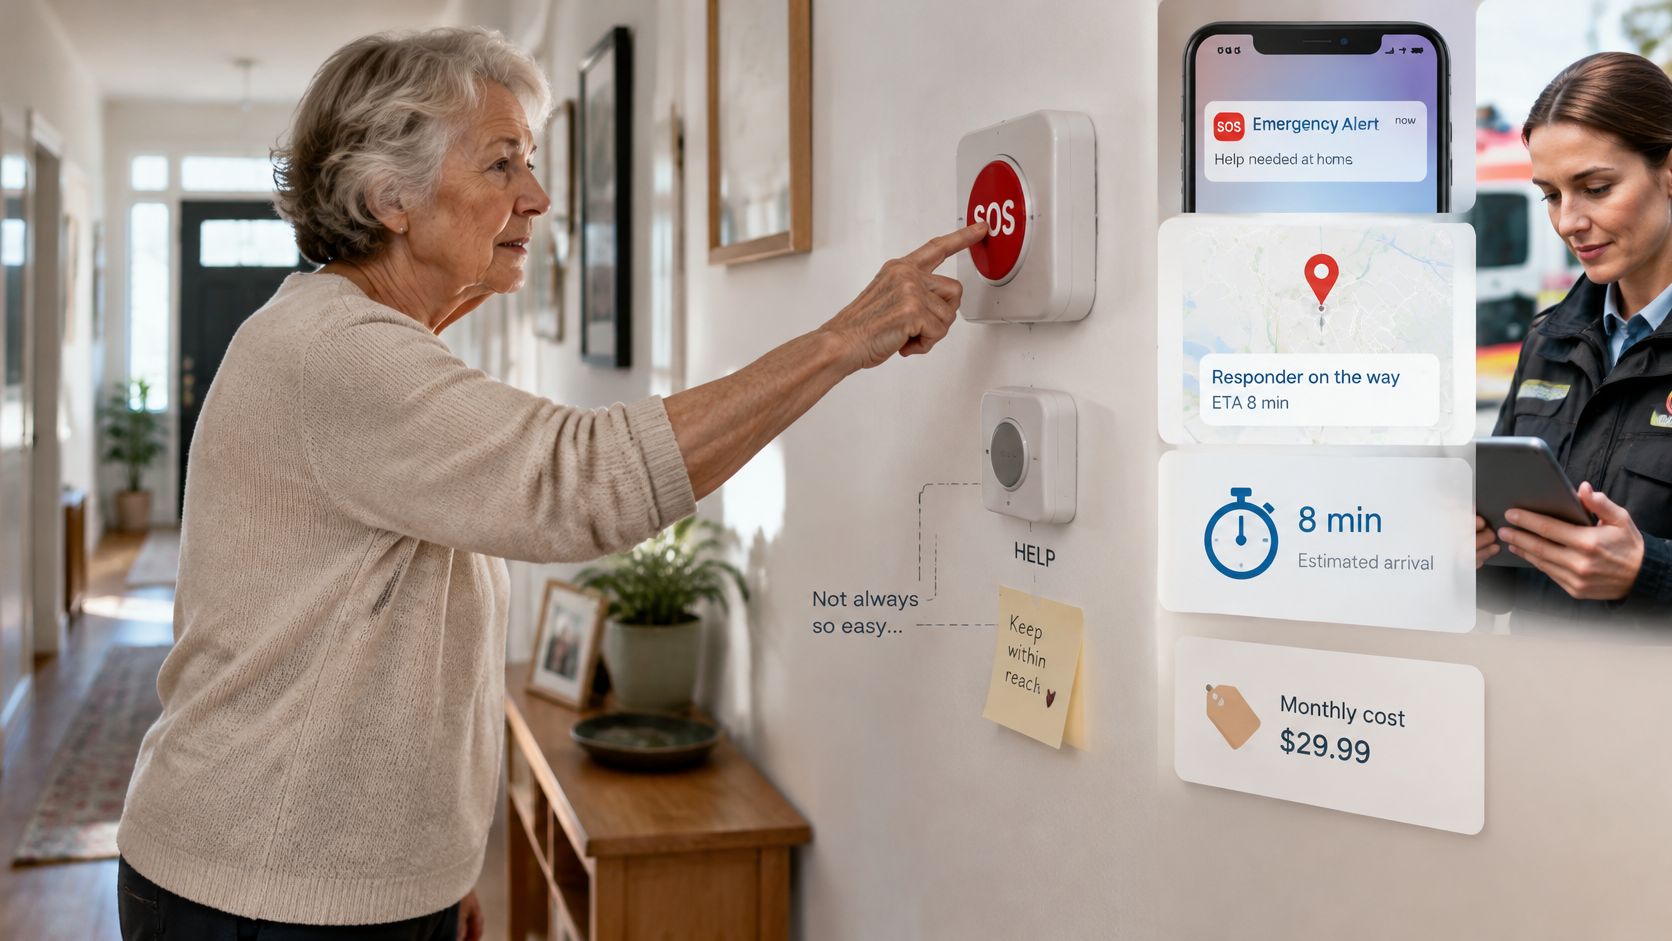
A review of personal emergency response systems links non-use to difficult activation, forgetting, cost, limited understanding, and uncertainty about when to press the button, and notes that people with intellectual and developmental disabilities are especially underrepresented in mainstream guidance. The same review found that only 11% of surveyed services explicitly reported mandated backup systems. So ask what happens if the button is never pressed.
Failure Modes and the Safeguards That Cover Them
| Failure | Why it happens | Safeguard |
|---|---|---|
| Button not pressed | Stress, injury or simply forgetting the device | Scheduled check-ins and inactivity detection |
| Device has no battery | Continuous GPS and streaming drain the phone | Battery alerts and a charged backup device |
| No data connection | Dead zones, underground spaces or indoor locations | SMS fallback or a satellite messenger |
| Imprecise location | Cell-site fallback or lost GPS indoors | Last valid fix, confidence data and entrance information |
| False alarm | Accidental press or misread movement | Cancellation with a PIN and clear escalation rules |
Battery deserves special attention because it’s the failure you can prevent most easily. Continuous GPS and streaming are demanding, and a phone that already drains quickly may not last through an incident. If yours is losing charge abnormally fast, it’s worth checking when phone battery drain needs professional repair rather than assuming a charger will always be nearby.
The safeguards that cover these gaps are layered, not single features. Look for scheduled welfare checks, movement-based prompts, fall or inactivity detection, trusted-contact escalation, and human confirmation before emergency dispatch. Say a lone worker is injured, can’t speak, and has no signal for a live stream. A missed check-in that escalates to a trusted contact may be the only protection that still functions.
The short video below walks through how an SOS flow looks when it’s working as intended.
Finish by answering one question for your own situation. Which failure would hurt you most, and which safeguard covers it? If you can’t name that safeguard, your setup has a gap whether the button itself works or not.
Choose the SOS Setup That Fits Your Situation
There’s no single best button. There’s a setup that matches where you are, who can respond, and whether you’ll be able to press anything at all.
SOS Setup by Situation
| Situation | Setup to consider | Why it fits |
|---|---|---|
| Late walks home | Phone SOS with live route and one contact watching | Lets someone follow the route in real time |
| Rideshare trips | Live stream from the phone with a shared trip contact | Creates a record if the trip goes wrong |
| Lone or night-shift work | Monitored app with scheduled check-ins | Covers the case where the worker cannot press |
| Campus or dormitory | Wall-mounted panic buttons plus a phone app | Fixed points inside buildings and a mobile option for travel |
| Family coordination | Shared monitoring with contacts who can trigger SOS for a member | Responds when a relative cannot press |
| Older adults living alone | Pendant with base unit and inactivity detection | Covers the case where the person cannot reach a phone |
A phone app suits people who are mobile. A pendant suits someone who’s mostly at home and may not carry a phone from room to room. Fixed panic buttons suit buildings where security already has a known route to the room. Speed of access still matters within each choice. From a locked phone, our live SOS can start with as few as 2 taps, and our Lock Screen widgets put Go Live, SOS and Trigger SOS for a Friend just below the clock.
With a monitored service, know what you’re buying. You’re paying for a trained agent who can call or chat with you, view the stream, and escalate to 911 when needed, not just for software. Before you commit, check the full costs, including the device purchase, monthly monitoring fees, any dispatch charge, and whether battery replacement or a backup device is included. Cost is one reason people stop using these systems, so a price you can’t sustain becomes a reliability problem. Confirm which regions the service supports, too.
Then do one thing. Pick the setup that fits your most common risk, run a test with a contact, and confirm the status updates appear before you rely on it.
If you want an SOS button backed by a trained Safety Agent who can view your live stream and location and escalate to 911 through RapidSOS, explore what 3rd-i offers for late walks, rideshares, campus life, and lone work. Set it up today, add contacts who know the plan, and run a test alert before you ever need it for real.